LED Control Using a Button
Project 1:
Introduction
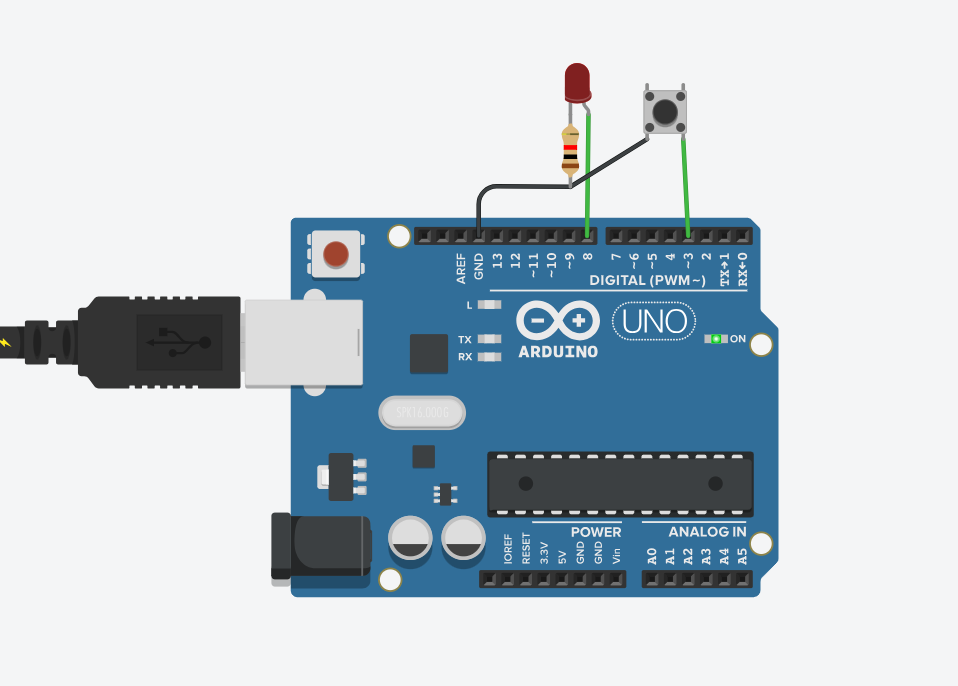
In this project, we will learn how to control an LED using a button. When the button is pressed, the LED changes its state. If the LED is off, it turns on. If it is on, it turns off. This is a simple project for beginners who want to learn Arduino programming and button input.
Components
- Arduino board
- 1 LED
- 1 Button
- 1 Resistor (220Ω for the LED)
- Breadboard
- Jumper wires
Code
1
2
3
4
5
6
7
8
9
10
11
12
13
14
15
16
17
18
19
20
const byte buttonPin = 3;
const byte ledPin = 8;
bool ledState = false;

void setup()
{
  pinMode(buttonPin, INPUT_PULLUP);
  pinMode(ledPin, OUTPUT);
}

void loop()
{
  if (digitalRead(buttonPin) == LOW)
  {
    ledState = !ledState;
    digitalWrite(ledPin, ledState);
    while (digitalRead(buttonPin) == LOW);
    delay(20);
  }
}
Code Explanation
First, we define the button pin and the LED pin. We also create a variable called ledState to store the current state of the LED.
In the setup() function, the button is configured as INPUT_PULLUP, and the LED is configured as an output.
Inside the loop() function, the Arduino checks if the button is pressed. When the button is pressed, the LED state is reversed. If the LED is off, it turns on. If it is on, it turns off.
The while loop waits until the button is released, preventing multiple state changes from a single press. The small delay helps reduce button bouncing.
Project 2: Controlling Two LEDs with a Button
Introduction
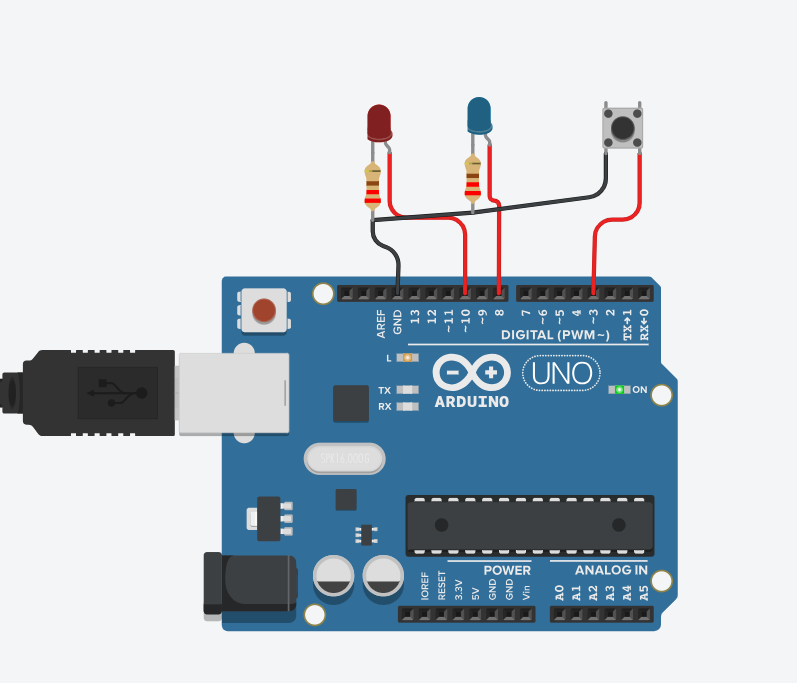
In this project, we will learn how to control two LEDs using a button. The first LED automatically turns on and off every five seconds using the millis() function. The second LED changes its state when the button is pressed.
This project is a good way to learn how to use timing functions in Arduino and how to control multiple outputs at the same time.
Components
- Arduino board
- 2 LEDs
- 1 Button
- 2 Resistors (220Ω)
- Breadboard
- Jumper wires
Code
1
2
3
4
5
6
7
8
9
10
11
12
13
14
15
16
17
18
19
20
21
22
23
24
25
26
27
28
#define led1 8
#define led2 9
#define b1 3

unsigned long duration;
bool flage1;

void setup()
{
  pinMode(led1, OUTPUT);
  pinMode(led2, OUTPUT);
  pinMode(b1, INPUT_PULLUP);
}

void loop()
{
  if (millis() > duration + 5000)
  {
    duration = millis();
    flage1 = !flage1;
    digitalWrite(led1, flage1);
  }
  if (digitalRead(b1) == 0)
  {
    delay(100);
    digitalWrite(led2, !digitalRead(led2));
  }
}
Code Explanation
First, we define the pins used for the two LEDs and the button.
In the setup() function, both LEDs are configured as outputs, and the button is configured as INPUT_PULLUP.
Inside the loop() function, the Arduino continuously checks the elapsed time using the millis() function. Every five seconds, the state of the first LED is changed, causing it to turn on and off automatically.
The Arduino also checks the button state. When the button is pressed, the second LED changes its state. If it is off, it turns on. If it is on, it turns off.
This simple project demonstrates how Arduino can perform more than one task at the same time by using the millis() function together with button input.